
USD/CHF Analysis
Daily Timeframe (D1)
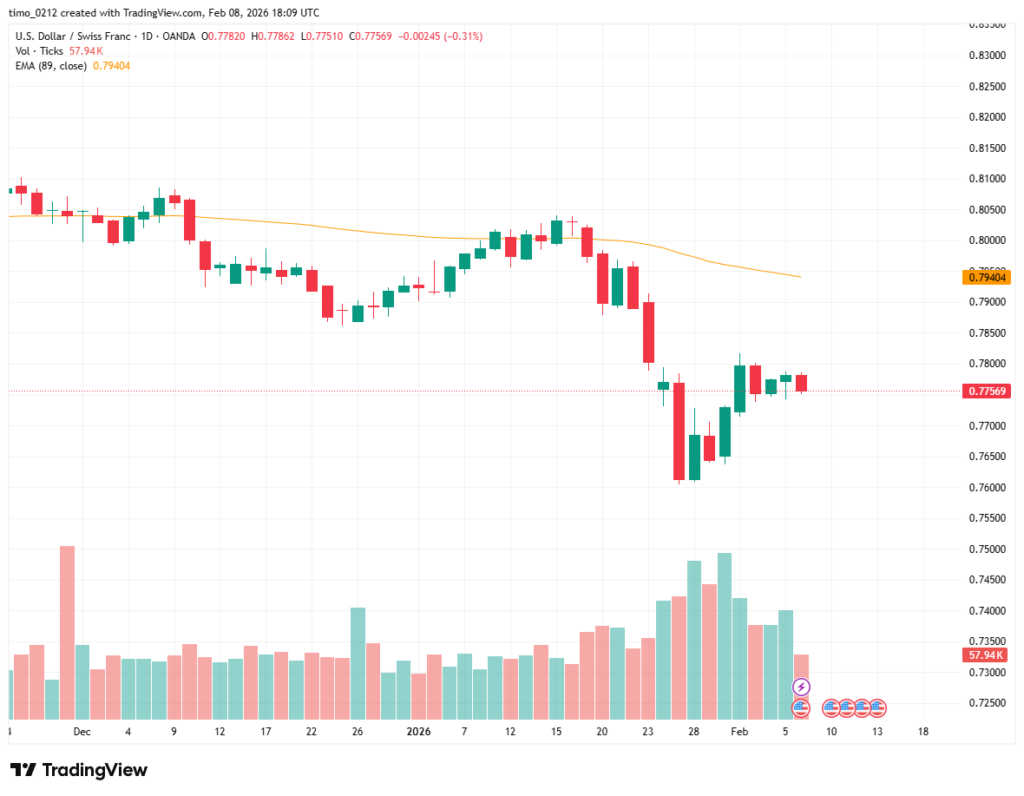
On the D1 chart, USD/CHF remains in a clear bearish trend, as price is currently trading below the EMA 89, which is acting as dynamic resistance. As long as price stays under this key moving average, the overall market structure continues to favor sell-side opportunities.
To refine entry points, we shift to the lower timeframe.
H4 Timeframe
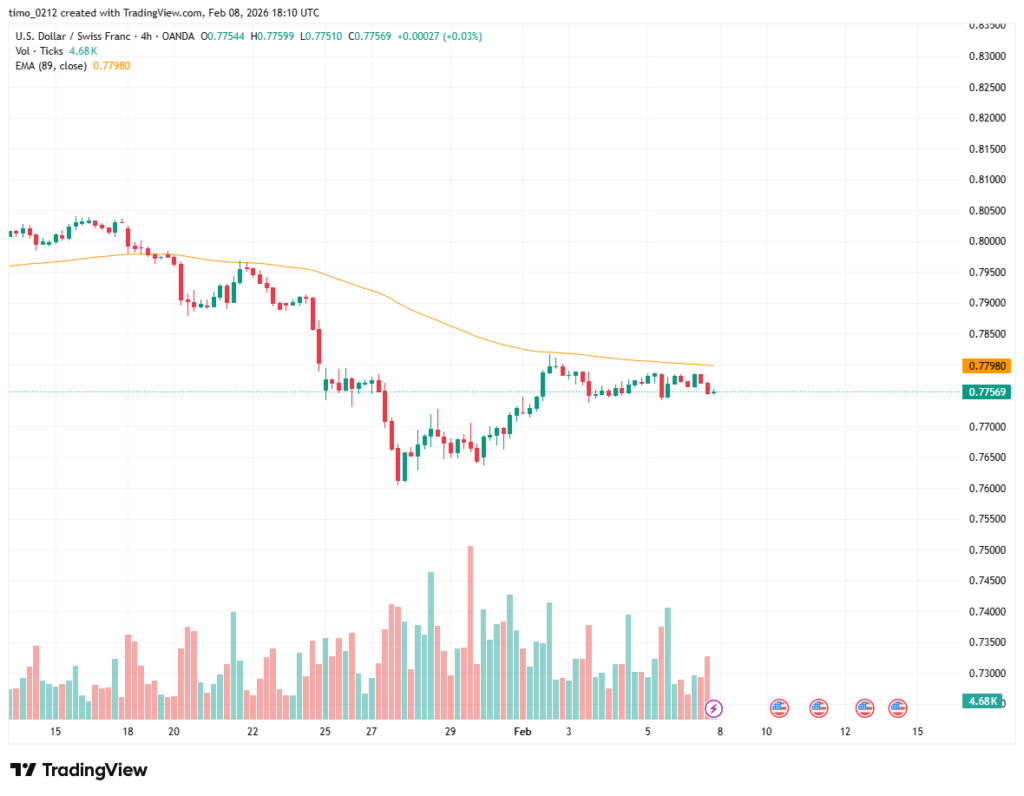
On the H4 chart, price is approaching the EMA 89 resistance zone and has started to consolidate around the 0.778x area, forming a short-term ranging structure below resistance. This zone offers a potential Sell opportunity in alignment with the higher-timeframe downtrend.
Trade Plan – USD/CHF
- Sell Entry: 0.7780
- Stop Loss: 0.7820
- Take Profit 1: 0.772x (R:R ≈ 1:2)
- Take Profit 2: 0.7670 (R:R ≈ 1:3)
USD/CAD Analysis
Daily Timeframe (D1)
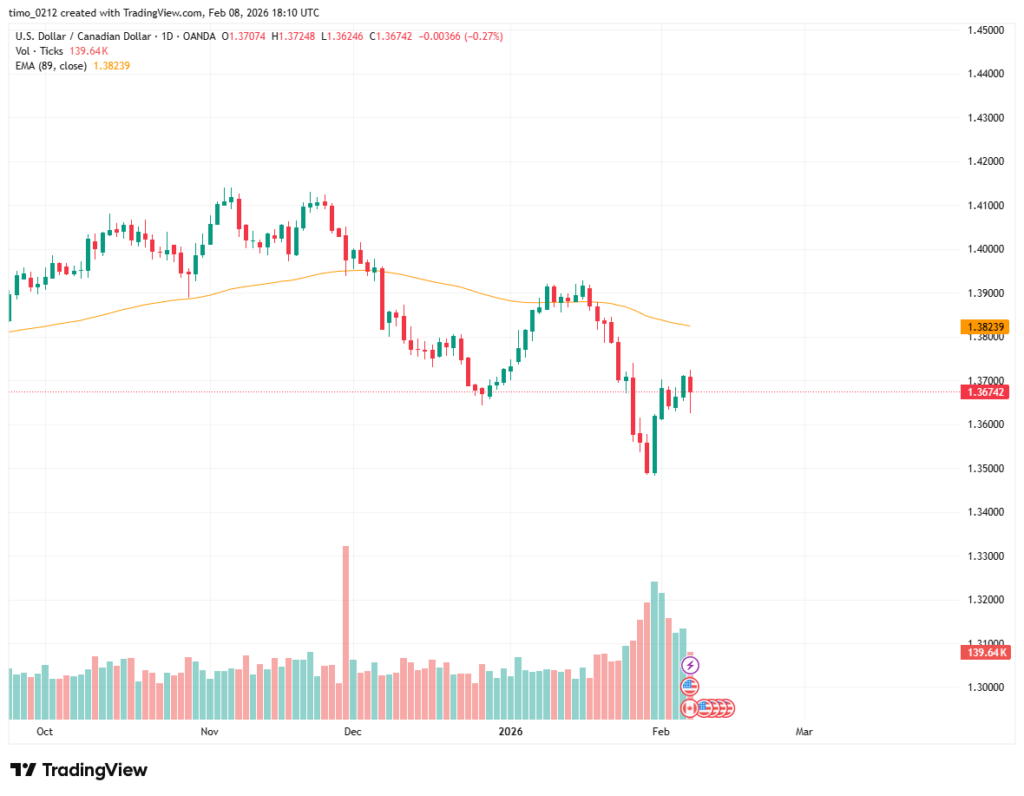
On the daily chart, USD/CAD is trending bearish, with price consistently trading below the EMA 89. This confirms that the dominant market bias remains to the downside, and Sell setups are preferred over Buy attempts.
H4 Timeframe
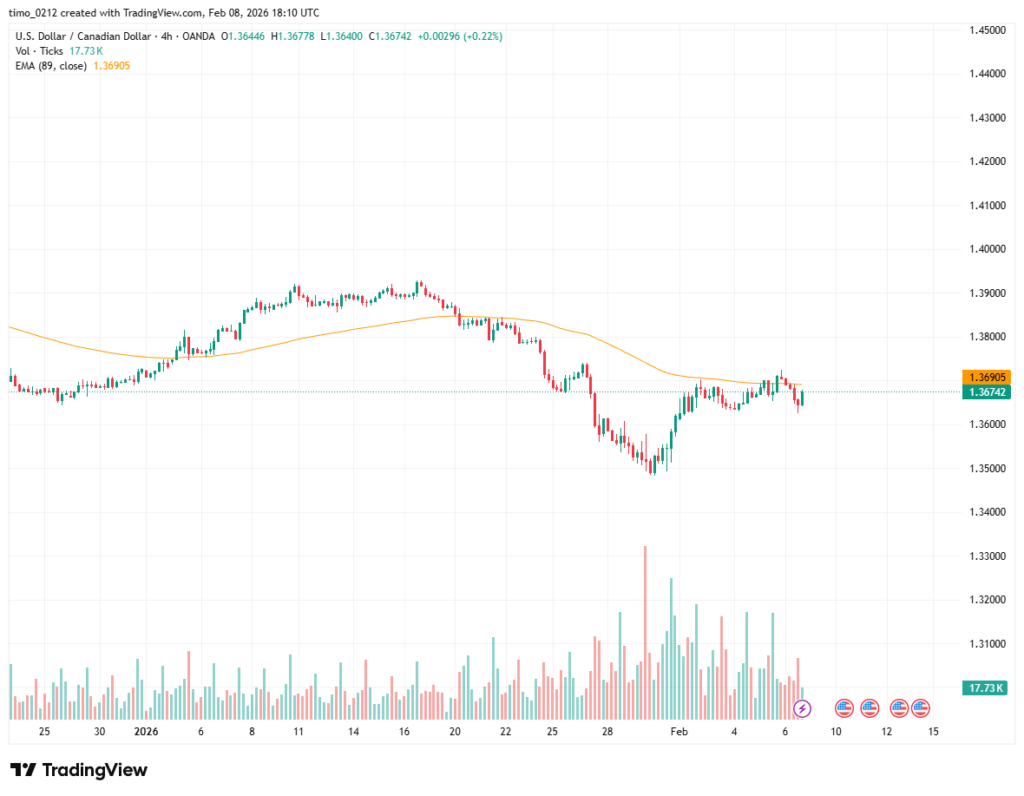
On the H4 chart, USD/CAD previously broke above the EMA 89 but failed to hold above it, quickly reversing and moving back below the EMA. This failed breakout aligns with the bearish structure on the D1 timeframe and strengthens the bearish bias.
A Sell setup can be considered around the EMA 89 zone, with a more conservative approach being to wait for a clear H4 candle close back below EMA 89.
Trade Plan – USD/CAD
- Sell Entry: 1.369xx
- Stop Loss: 1.37420
- Take Profit 1: 1.36340 (R:R ≈ 1:2)
- Take Profit 2: 1.35000 (R:R ≈ 1:6)
NZD/USD Analysis
Daily Timeframe (D1)
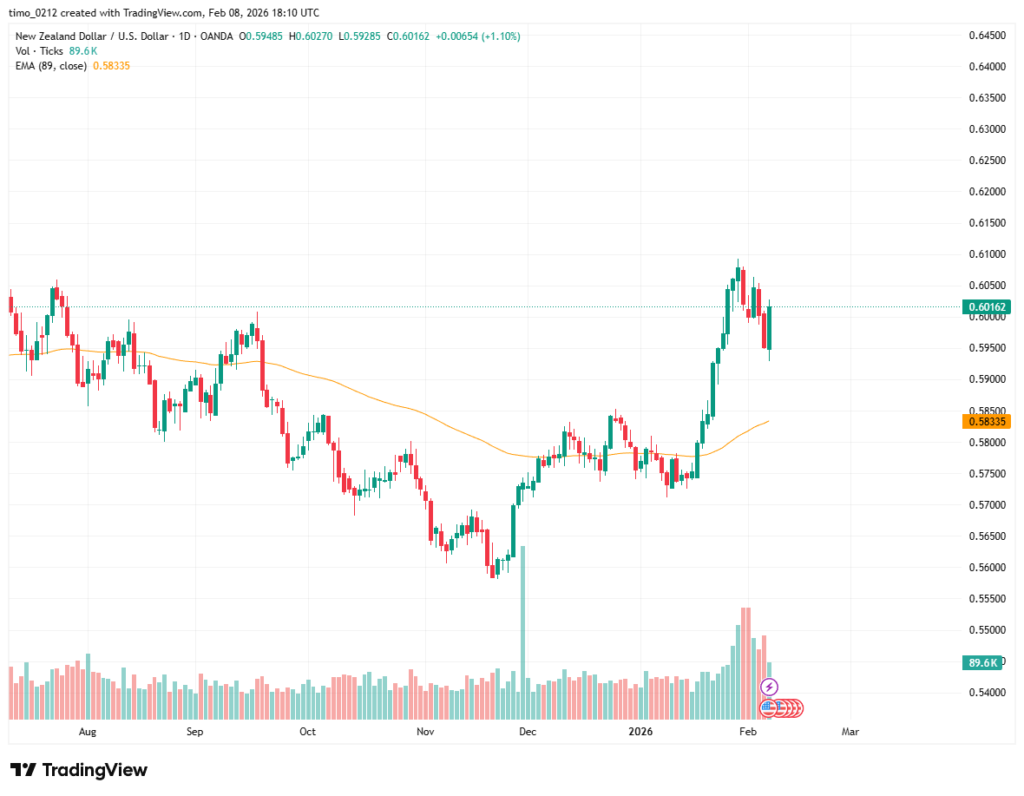
On the D1 chart, NZD/USD is in a strong bullish trend, with price trading well above the EMA 89. The momentum remains positive, suggesting that pullbacks are more likely to be buying opportunities rather than trend reversals.
H4 Timeframe
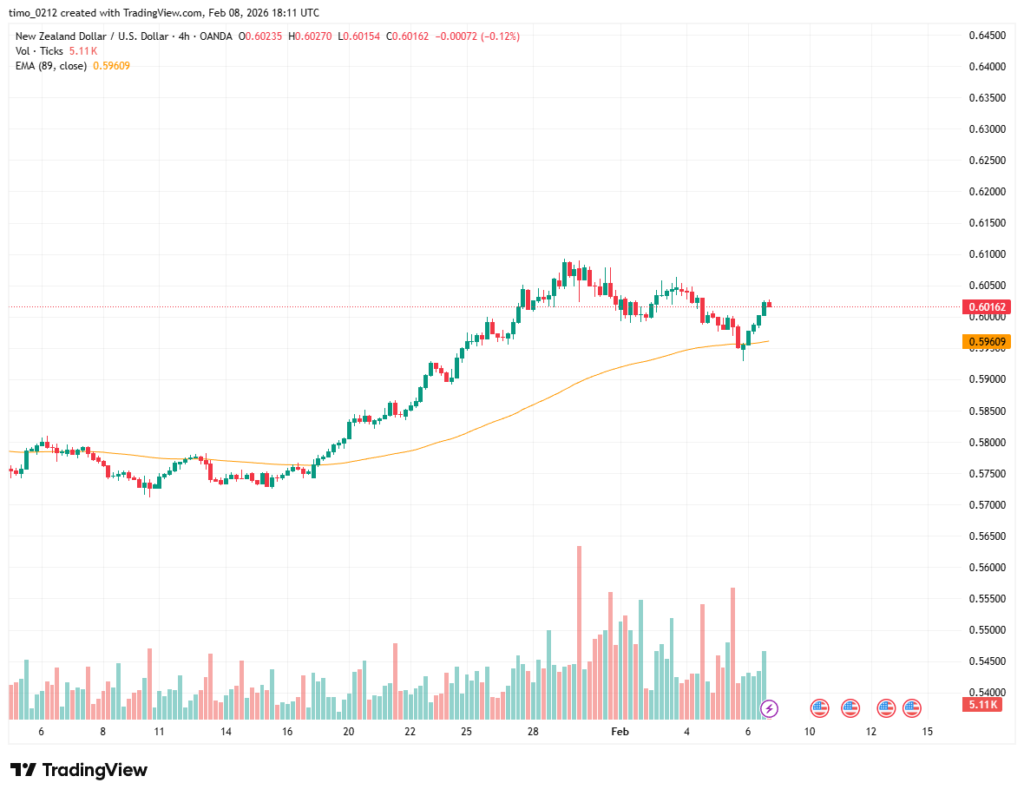
On the H4 chart, price previously pulled back to the EMA 89 and then rebounded strongly, confirming EMA 89 as dynamic support. If price revisits this zone again, it may provide another high-probability Buy opportunity in line with the higher-timeframe uptrend.
Potential Trade Setup – NZD/USD
- Buy Entry: 0.5960
- Stop Loss: 0.5925
- Take Profit 1: 0.604xx (R:R ≈ 1:2.6)
- Take Profit 2: 0.608xx (R:R ≈ 1:3.5)
AUD/USD Analysis
Daily Timeframe (D1)
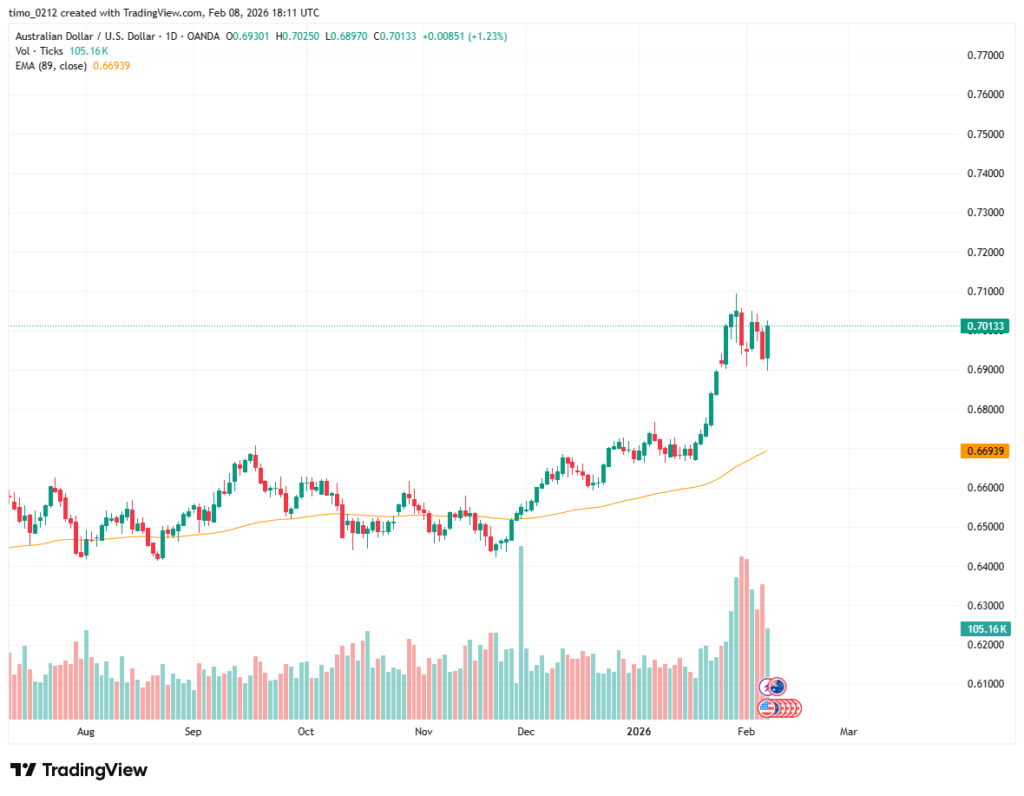
On the daily timeframe, AUD/USD continues to trade within a solid uptrend. In this market condition, the focus should be on finding Buy opportunities, rather than attempting to predict market tops and selling against the trend.
H4 Timeframe
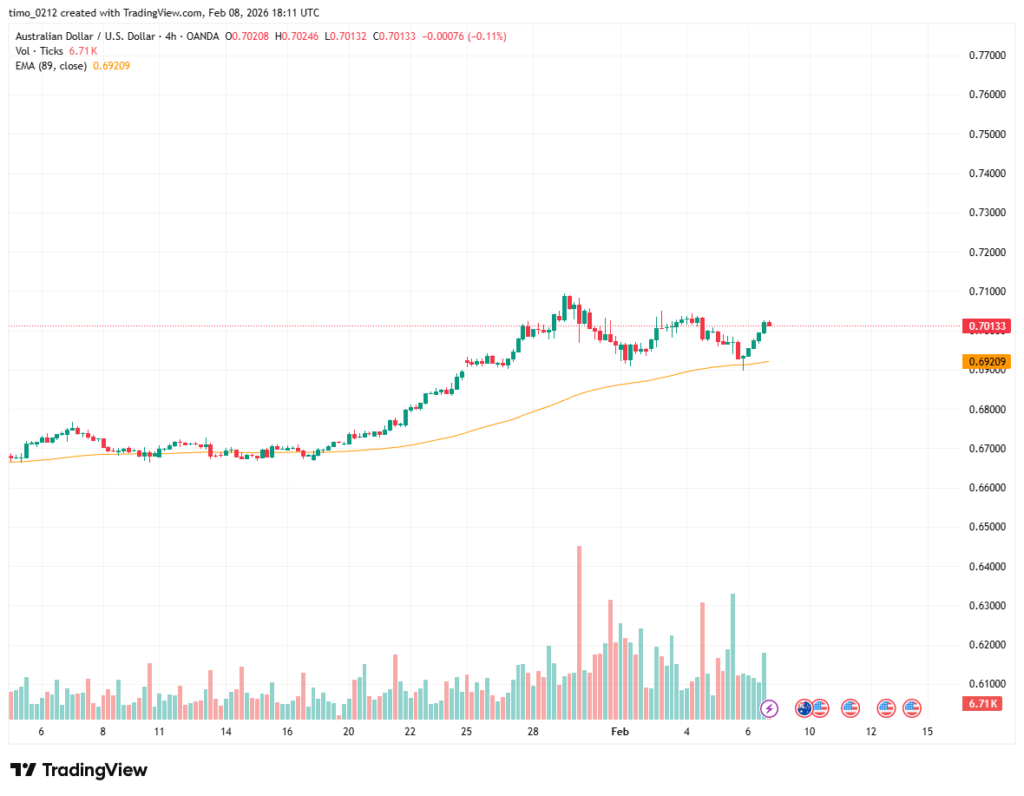
On the H4 chart, AUD/USD previously retraced to the EMA 89 and then pushed higher again. Notably, the prior candle formed a long lower wick below EMA 89, signaling strong buying pressure. Shortly after, price reclaimed and held above EMA 89, reinforcing bullish momentum.
This behavior supports the idea of looking for Buy setups near the EMA 89 support zone.
Potential Trade Setup – AUD/USD
- Buy Entry: 0.6921x
- Stop Loss: 0.68930
- Take Profit 1: 0.703xx (R:R ≈ 1:3.5)
- Take Profit 2: 0.708xx (R:R ≈ 1:4.7)